The Essential Guide to Sawhorses: From Novice to Master
Introduction
Ah, the humble sawhorse: a staple of the woodworking world, yet often overlooked in its simplicity. But don't be fooled by its unassuming appearance. This indispensable tool is the foundation for countless projects, from simple cuts to complex cabinetry. In this comprehensive guide, we'll dive into everything you need to know about sawhorses, from selecting the right type to mastering their use like a pro. So, gather your tools and let's embark on a journey to elevate your woodworking skills!
Chapter 1: Choosing the Perfect Sawhorse
1.1 Types of Sawhorses
-
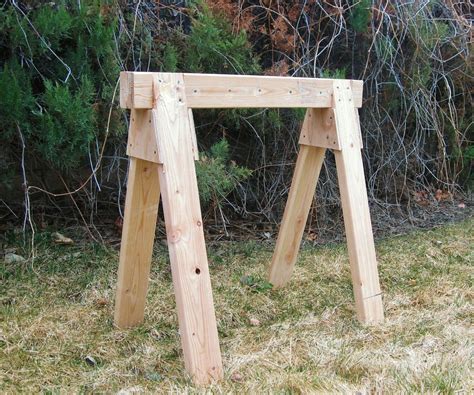
Standard Sawhorses: The most common type, featuring two legs connected by a crossbar. They're sturdy and versatile, handling most cutting tasks.
-
Folding Sawhorses: As the name suggests, these fold for easy storage. They're lightweight and portable, perfect for smaller workspaces.
-
Adjustable Sawhorses: Allow you to customize the height to suit your project. Ideal for uneven work surfaces or when working on angles.
1.2 Materials
-
Wood: Traditional and durable, but prone to rot and insect damage.
-
Metal: Strong and weather-resistant, but heavier and more expensive than wood.
-
Plastic: Lightweight and corrosion-resistant, but less durable than wood or metal.
Chapter 2: Setting Up Sawhorses
2.1 Positioning

- Place sawhorses parallel to each other, with a distance between them that accommodates the length of the material you'll be cutting.
- Ensure the sawhorses are level and stable. Use wedges or shims to compensate for uneven surfaces.
2.2 Securing the Material

- Clamp or secure the material to the sawhorses using C-clamps, straps, or vises. This prevents the material from moving during cuts.
- If cutting heavy material, consider using additional support, such as blocking or a workmate.
Chapter 3: Masterful Techniques
3.1 Accurate Cuts
- Use a square to mark the cutting line on the material.
- Position the sawhorse so that the cutting line is directly above the crossbar.
- Use a straight edge or guide to ensure the saw follows a straight path.
3.2 Crosscuts
- Place the material perpendicular to the sawhorses.
- Hold the saw firmly and apply even pressure throughout the cut.
- Use a stop block to ensure a consistent depth of cut.
3.3 Rip Cuts
- Position the material parallel to the sawhorses.
- Use a ripping blade and ensure the saw is set to the correct depth of cut.
- Use a featherboard or push stick to control the material and prevent kickback.
Chapter 4: Common Mistakes to Avoid
-
Unstable Sawhorses: Ensure the sawhorses are level and secure before using them.
-
Improper Material Placement: Position the material correctly to avoid cuts that are off-center or at an angle.
-
Lack of Clamping: Properly secure the material to the sawhorses to prevent movement and accidents.
-
Improper Saw Technique: Use the appropriate saw blade and cutting technique for the material and task.
-
Ignoring Safety: Always wear safety glasses, gloves, and appropriate clothing when using sawhorses and power tools.
Chapter 5: A Step-by-Step Approach to Using Sawhorses
5.1 Preparing
- Gather your materials, tools, and safety gear.
- Select the appropriate sawhorses for the project.
- Set up the sawhorses in a stable and level position.
5.2 Cutting
- Secure the material to the sawhorses.
- Position the saw and cutting line correctly.
- Make the cut while maintaining control and applying even pressure.
5.3 Finishing
- Remove the material from the sawhorses.
- Clean up any sawdust or debris.
- Store the sawhorses safely until next use.
Chapter 6: Frequently Asked Questions (FAQs)
6.1 What is the ideal height for sawhorses?
The optimal height depends on your height and the project you're working on. Aim for a height that allows you to work comfortably without hunching or straining.
6.2 How much weight can sawhorses support?
The weight capacity varies depending on the type and material of the sawhorse. Standard sawhorses typically support around 1,000 pounds, while heavy-duty sawhorses can handle up to 2,000 pounds.
6.3 What is the best way to store sawhorses?
Store sawhorses in a dry and protected area. Avoid leaving them outdoors or in damp conditions. When possible, fold or stack sawhorses to minimize space.
Call to Action
So, there you have it, folks! From novice to master, now you're equipped with the knowledge to harness the power of sawhorses like a pro. Use these tips and techniques to elevate your woodworking projects, increase efficiency, and stay safe in your workshop.
Remember, practice makes perfect, so don't be afraid to experiment and refine your skills with every project. As you gain experience, you'll develop your own techniques and preferences.
So, what are you waiting for? Grab your sawhorses, gather your materials, and let's saw something amazing!
